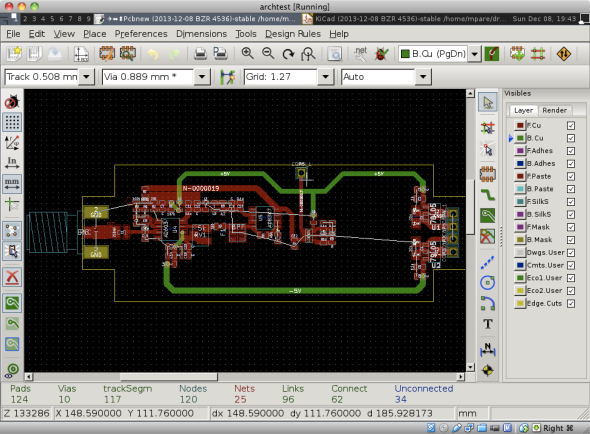
Install KiCad on Arch Linux
Posted: December 8, 2013 Filed under: KiCad, Linux | Tags: Arch Linux, CAD, KiCad 1 CommentI’ve been using KiCad on and off for a few years now. I like KiCad reasonably well but it doesn’t always play well with Mac OS X so I usually run it in a Linux Virtual Machine. Here are the install steps for Arch Linux assuming that the X Windows System, graphical interface environment, is already installed.
Install Instructions
# Update Pacman and download dependencies
sudo pacman -Syy
sudo pacman -S cmake bzr wxgtk glew

# Configure bzr username...
# Even though I would prefer not to...
bzr whoami paretech

# Change into Arch User Repository download directory
# or wherever the download should go.
cd ~/aur

# Download Bzr Tools (includes the necessary Bzr Patch plugin)
curl https://aur.archlinux.org/packages/bz/bzrtools/bzrtools.tar.gz --remote-name

tar -xzvf bzrtools.tar.gz

cd bzrtools

# Inspect PKGBUILD first!
makepkg

sudo pacman -U bzrtools*.xz

# Download Kicad AUR and name file same as remote name
curl https://aur.archlinux.org/packages/ki/kicad-bzr/kicad-bzr.tar.gz --remote-name

tar -xzvf kicad-bzr.tar.gz

cd kicad-bzr

# Inspect PKGBUILD first!
makepkg

sudo pacman -U kicad-bzr*.xz
That’s all there is to it on Arch. Good luck on your next PCB and Happy Hacking!
Hacking Apple Headphones for Assistive Technology
Posted: December 7, 2013 Filed under: Hardware | Tags: Apple, Assistive Technology 1 Comment A while back I took opportunity to hack together a piece of Assistive Technology (AT) for a good friend of mine using a damaged pair of Apple Earphones with Remote and Mic. The first version, pictured on the right, is constructed with a three button array found on ebay.
The second version, pictured at the bottom, is constructed with large arcade buttons from Sparkfun and a custom enclosure that I made with sheet metal, a breaker bar and pop (blind) rivets. This version should be easier to use than the first as it has larger softer buttons, less dangling wires and a case that can withstand being squished between an electric wheel chair and a door frame.
If you are interested in what is inside the Apple Earphone controller, there is a wonderful tear down post.
Install Arch Linux as VirtualBox Guest OS
Posted: December 7, 2013 Filed under: Tech | Tags: Linux, virtual machines 4 CommentsWhen I was an intern at Sandia National Laboratories I was introduced to the concept of using virtual machines to sandbox my projects. I have found this to be very helpful for many software experiments and development environments. I even use virtual machines to run my day-to-day Linux install. Here I give my notes on how to use Virtual Box to run an Arch Linux guest install on Mac OS X. Once a base install is complete it’s easy to make snapshots and spin up and destroy clones from the base install as needed.
Create New Virtual Machine
- Download Arch Linux ISO Live CD
-
Create VirtualBox Disk Image (VDI) with desired settings.
-
Load the Arch Linux ISO as a CD/DVD image and select the “Boot Arch” option when the live CD boots.
Partition the drive(s)
# gdisk /dev/sda
| Name | Cmd | # | Start | Stop | Code | Type |
|---|---|---|---|---|---|---|
| Boot | n | 1 | 0 | +250M | 8300 | (Linux Filesystem) |
| Swap | n | 2 | 0 | +2G | 8200 | (Linux Swap) |
| Root | n | 3 | 0 | -0M | 8300 | (Linux Filesystem) |
- Use the n command and values (above) to create partitions using gdisk.
- Print the the gdisk partition table with the p command.
- Write the gdisk partition table with the w command.
Install and Configure System
# Format Partitions
mkfs.ext4 /dev/sda1
mkswap /dev/sda2
mkfs.ext4 /dev/sda3


# Mount Partitions
mount /dev/sda3 /mnt

mkdir /mnt/boot
mount /dev/sda1 /mnt/boot

swapon /dev/sda2


# Configure Mirrors


# Install Base System
pacstrap /mnt base base-devel linux


# Generate File System Table
genfstab -p /mnt >> /mnt/etc/fstab


# Set hostname
echo 'myarch' > /etc/hostname


# Change Root Directory
arch-chroot /mnt


# Configure language
echo LANG="en_US.UTF-8" >> /etc/locale.conf
echo LC_COLLATE="C" >> /etc/locale.conf
echo LC_TIME="en_US.UTF-8" >> /etc/locale.conf
echo "en_US.UTF-8 UTF-8" >>/etc/locale.gen

locale-gen

ln -s /usr/share/zoneinfo/America/New_York /etc/localtime
hwclock --systohc --utc


# Generate Ram Disk
mkinitcpio -p linux


# Install and Configure Bootloader
pacman -S syslinux gdisk
syslinux-install_update -iam


# Exit CHROOT, Unmount Drives and Reboot
exit
umount -R /mnt
reboot
Post Install
The following isn’t really intended to be executed as a script.
# Setup Network
systemctl start dhcpcd
systemctl enable dhcpcd

# Virtual Box Guest Utilities
# https://wiki.archlinux.org/index.php/VirtualBox#Arch_Linux_as_a_guest_in_a_Virtual_Machine
pacman -S virtualbox-guest-utils --noconfirm

modprobe -a vboxguest vboxsf vboxvideo

echo vboxguest >> /etc/modules-load.d/virtualbox.conf
echo vboxsf >> /etc/modules-load.d/virtualbox.conf
echo vboxvideo >> /etc/modules-load.d/virtualbox.conf

groupadd vboxsf

systemctl enable vboxservice
systemctl start vboxservice

# X Windows System
pacman -S xorg-server xorg-server-utils xorg-xinit xterm ttf-dejavu --noconfirm

pacman -S awesome

# User Configuration
pacman -S sudo --noconfirm

# use visudo to add  under "User privilege specification" before
# using sudo as

# Replace user_name with desired user name.
useradd -m -g users -G optical,power,storage,vboxsf -s /bin/bash user_name

chown root.vboxsf /media

# Set  password using "# passwd "
# Set root password using "# passwd"


# Update Packages and System
pacman -Syy
pacman -Syu
Per User Config
Configuration for users other than root.
echo /usr/bin/VBoxClient-all >> ~/.xinitrc
echo "exec awesome" >> ~/.xinitrc

ln -s /media/sf_share_name/* ~/share_name
